Overview | Info/Download | Documentation | Sample Projects 
Making a GoGo board | Board Variations | Links | FAQ


.

GoGo Board Active-X Control Documentation

For GoGoX version 1.2

by
Arnan (Roger) Sipitakiat (arnans@media.mit.edu)

Future of Leaning Group
MIT Media Laboratory

.
 

This document is divided in to two sections: the command listing and code examples. The following is the overall structure of these two sections.

GoGoX Command Listing

Examples


  GoGoX Command Listing

General Commands (See Example 1)
Command Description
version Returns the GoGoX control's version number
CommPort Defines the COM port to use. Must set this before initializing the board.
Initialize Opens the COM port.
ping Pings the GoGo board
CloseComm Closes the COM port.
   

Output Port Commands  (See Example 2)

Command Description
TalkTo (Motor Bits) Sets the active motor ports. Each bit in "Motor Bits" byte defines which port to be active.

i.e. TalkTo 5 will set port 1 and 3 (A and C) active, as 5 (base 10) = 0000 0101 (base 2)

Working with bits.

You can calculate this "Motor Bits" value by adding up the "Bit Value" (shown in the following table) of each port you want to set active.

Motor Bit Number Bit Value
A 0 1
B 1 2
C 2 4
D 3 8
E 4 16
F 5 32

So, for example, if you want to set port A, C, and F active, the Motor Bits value would be:

1 + 4 + 32 = 37

If you want to set all ports active, the value would be:

1 + 2 + 4 + 8 + 16 + 32 = 63
mOn Turns on the active ports
mCoast Coasts the active ports.
mBreak Breaks the active ports. Break is useful when the port is used to control a motor. It stops the motor immediately. Whereas, coast simply turns of the power, which may allow the motor to gradually slow down. Please note that Break consumes a lot of power. So, try not to leave any ports on the break state for too long.
mOff Turns off the active ports. Off is a macro. It Breaks for a short time then switches to Coast.
mThisway Sets the polarity of the active ports to "this way"
mThatway Sets the polarity of the active ports to "that way", which is the opposite of "this way"
mRd Reverses the polarity of the active ports
SetPower (Power Level) Sets the power level of the active output ports. Power level ranges from 0 (off) to 7 (default). Note that I use PWM (Pulse Width Modulation) to implement the power level. Thus, the output voltage does not change. The GoGo board just pulses it.
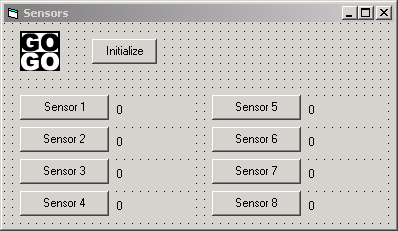
   
Sensor Commands  (See Example 3, Example 4)
Command Description
ReadSensor (Sensor number) Gets a value between 0-1023 from the specified sensor port.
ReadSensorMax (Sensor number) The GoGo board detects and saves the maximum sensor value it sees on each port. ReadSensorMax() accesses this value on the board. Max value is reset to 0 after each read.
ReadSensorMin (Sensor number) Similar to ReadSensorMax() but it detects the minimum value instead.
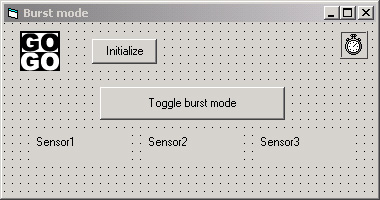
BurstMode (Sensor bits) Turns on burst mode for the sensor ports defined by the "Sensor bits" byte. The "Sensor bits" value can be calculated the same way as the "Motor bits" of the "Talk To" command. Please look at the "Working with Bits" section above. Here is and extended "Bit Value" table for Sensors.
Sensor Bit Number Bit Value
1 0 1
2 1 2
3 2 4
4 3 8
5 4 16
6 5 32
7 6 64
8 7 128

Burst mode tells the GoGo board to continuously send the selected sensor ports' data. This mode gives a much higher refresh rate than constantly polling sensor values with the ReadSensor command. A refresh rate of 29Hz per port was reached in my experiment with all 8 sensor ports on. Thus, a refresh rate of up to 232Hz (29 x 8) or higher is possible when only 1 port is in burst mode.


SensorBuffer (Sensor Number) Sensor Number ranges from 0 to 7 (0 = sensor1)

Returns sensor data received in burst mode. When a sensor port is set to burst mode (with the BurstMode command), the sensor readings will be stored in a buffer. This function accesses that buffer.

Note: -1 is returned if no new burst mode sensor data has arrived since the last read.


  GoGoX Visual Basic Examples


Example 1: Initializing the GoGo Board


This example will initialize the serial (COM) port and test the presence of the GoGo board.

Follow these steps:

  • Create a new form (form1)
  • Add the GoGoX control to your toolbox (menu Project/Components or Ctrl-T). The control name will change depending on the GoGoX version you have.


  • Create the GoGoX control on the form.
  • Create a button (command1). Double click the button and add the following code.
Private Sub Command1_Click()
On Error GoTo ErrorHandler

' Set form caption = control version number
Form1.Caption = GoGoX1.version
' Set COM port number to use
GoGoX1.CommPort = 1
' Initialize the COM port
GoGoX1.Initialize
' ping tests the communication between the computer 
' and the GoGo board
GoGoX1.ping
' Show message
MsgBox "Initialization complete"

Exit Sub

' Shows error message if any of the above
' steps fail
ErrorHandler:
MsgBox Err.Description

End Sub

Here's how the form would look like.


Example2: Controlling Output Ports
 

Download this Example: example2.zip (2k)

This example will show how to set active ports and how to perform port operations (On, Off, Break, and Coast).

  • Initialize the COM port using the code in example 1
  • Create a button. Set the caption property to "A"
  • Add this line of code to the "A" button, which will set output port A as the active port.
GoGoX1.TalkTo 1
  • Add another button. Set the caption to "ON"
  • Add this line of code to the button. It will turn ON the active ports.
GoGoX1.mOn
  • Add a third button. Set the caption of "OFF"
  • Add this code to make it turn OFF the active ports.
GoGoX1.mOFF

This is how the form would look like:

Run it!

Now attach a motor to port A. Run the program. Initialize the board. Then press the "ON" button. Nothing would happen, as we haven't set any active ports. Try again, but this time hit the "A"  button before the "ON" button. This time the motor should be on. Click the "OFF" button to stop.

From here, it should be straightforward to control more ports and add the "Coast" and "Break" functionalities to the program.

Download this Example: example2.zip (2k)


Example 3: Sensor Reading
 

Download this example: example3.zip (2k)

This example will show you how to read sensor values.

  • Initialize the COM port and the GoGo board using the code in Example 1
  • Create a button and set the caption to "Sensor 1"
  • Create a label and name it "lblSensor1"
  • Add the following code to "Sensor 1" button
lblSensor1.Caption = GoGox1.ReadSensor 1

Every time you click the "Sensor 1" button, sensor1's value will appear on the caption of the label.

You can easily add buttons and labels for all eight sensor ports using control arrays (See visual basic documentation). The program could look something like this.

Download this example: example3.zip (2k)


Example 4: Sensor Reading in Burst Mode
 

Download this example: example4.zip (2k)

This example shows how you could use burst mode to speed up the sensor-reading refresh rate. We will turn on burst mode for sensor port 1, 2, and 3.

  • Create a Boolean form variable BurstModeIsON
Dim BurstModeIsON As Boolean
  • Initialize the COM port and the GoGo board using the code in Example 1, but add the following line to initialize the BurstModeIsON variable.
BurstModeIsON = False
  • Create three labels. Name them lblSensor1, lblSensor2, and lblSensor3.
  • Create a timer. Set the "Enable" property to false. Set the "interval" property to 10 milliseconds. Add the following code to the control.
Dim SensorVal
' Note: This code could be much shorter
' if control arrays are used for
' the labels.

' Check for new sensor1 value
SensorVal = GoGoX1.SensorBuffer(0)
If SensorVal > -1 Then
   lblSensor1.Caption = SensorVal
End If

' Check for new sensor2 value
SensorVal = GoGoX1.SensorBuffer(1)
If SensorVal > -1 Then
   lblSensor2.Caption = SensorVal
End If

' Check for new sensor3 value
SensorVal = GoGoX1.SensorBuffer(2)
If SensorVal > -1 Then
   lblSensor3.Caption = SensorVal
End If
  • Create a button and set the caption to "Toggle burst mode"
  • Add the following code to the button:
If BurstModeIsON = False Then
   ' We want to turn on burst mode for sensor 1, 2, and 3
   ' So, Bits value = 7 (base 10), which is 0000 0111 (base 2)
   GoGoX1.BurstMode 7
Else
   ' Turn off burst mode.
   GoGoX1.BurstMode 0
End

' Toggle the variable value
BurstModeIsON = Not BurstModeIsON

Here's how the program may look like

When you hit the "Toggle burst mode" button, the sensor values will be displayed on the three labels.

Note: Burst mode does NOT prevent you from sending other commands to the GoGo board (i.e. output port controls). 

Download this example: example4.zip (2k)


  GoGoX Change Log

 
Version Changes

v 1.2 July 8, 2002

  • Add new sensor commands to detect MAX/MIN sensor readings
    • ReadSensorMax(Sensor number)
    • ReadSensorMin(Sensor number)


 Last updated: 2/15/2003 5:20:58 PM